
First the image needs to be uploaded on to VMware. Copy the ISO image on the local datastore in a folder that will be easy to spot when looking for it:

Then the image needs to be mounted on to the VM:
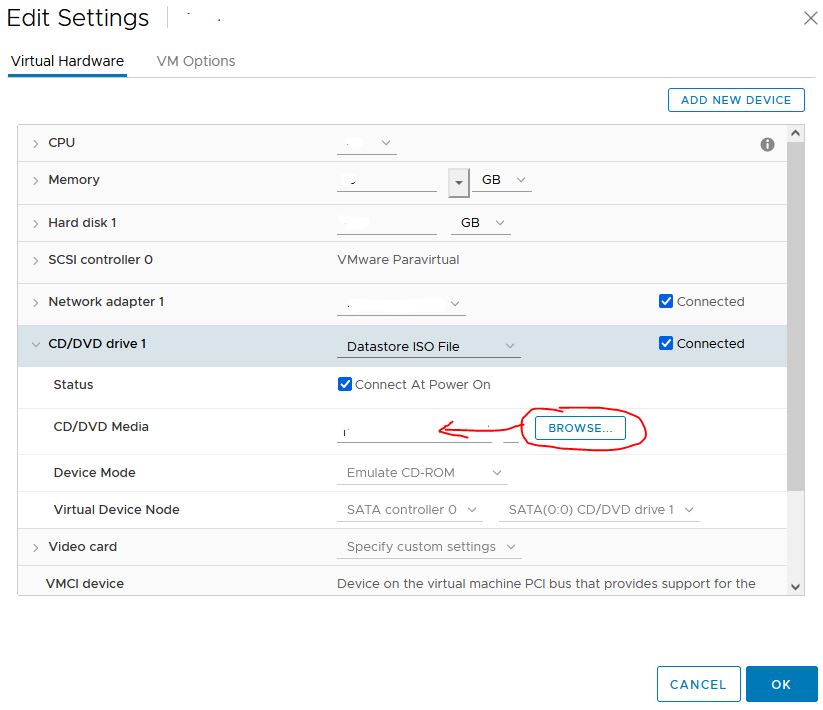
Please ensure the “Connected” box is ticked for obvious reasons 🙂
Once done, then we move on to the command line to mount the image locally on the VM:
# mkdir -p /mnt/disc
# mount /dev/cdrom /mnt/disc
Now the ISO image is mounted locally on the VM at /mnt/disc, time to set up the local repository. Although this is specific to RHEL 7.4 it should be identical for any other distro/version by amending the filename:
# cp /mnt/disc/media.repo /etc/yum.repos.d/rhel7dvd.repo
# chmod 644 /etc/yum.repos.d/rhel7dvd.repo
vi /etc/yum.repos.d/rhel7dvd.repo (or nano if you prefer!!)
Change “gpgcheck=1”
Add the below lines at the end of the file:
enabled=1
baseurl=file:///mnt/disc/
gpgkey=file:///etc/pki/rpm-gpg/RPM-GPG-KEY-redhat-release
# yum clean all
# yum repolist enabled
Now when you type yum -y install [package name] it should be able to install from the local repo!